Table of Contents (M6 Night Vision Scope User Operation Manual)
- Important Notice
- Unpacking Checklist
- Technical Specifications
- Device Dimensions
- Component Overview
- Setup and Installation
- Control Buttons and Functions
- Menu Navigation and Customization
- On-Screen Icon Guide
- Calibration and Focus Adjustment
- IR Flashlight Usage
- Charging and Power Options
- AI Zoom
- Troubleshooting Guide
1. Important Notice
General Warnings:
- Avoid Direct Exposure to IR Light: Infrared (IR) light is powerful and can be harmful to the eyes with prolonged exposure. Always ensure the IR flashlight is used responsibly. Avoid pointing it at reflective surfaces or flammable objects for extended periods, as this may cause heat buildup and increase fire risks.
- Battery Safety: For safe usage, remove the insulation sheet from the 18650 battery before operating the device. Ensure the battery is inserted in the correct orientation. Always use compatible batteries to avoid damage or malfunction. When not in use, always remove the battery to avoid any potential safety hazards or battery drainage.
- Night Vision Mode: Activate night vision mode in low-light or nighttime environments by pressing and holding the IR/DOWN button. This feature enhances visibility without compromising image quality.
Operating Conditions:
- Environment: Store the NightCrystal M6 Night Vision Scope in a clean, dry location with a temperature range of -10°C to 50°C. Avoid exposing the device to moisture, which can damage internal components.
2. Unpacking Checklist
Included Items:
- M6 Night Vision Scope: Main unit with integrated features.
- USB-C Charging Cable: For recharging the battery efficiently.
- MicroSD Card (if included): Preformatted and ready for use.
- 18650 Battery (if included): Pre-installed with an insulating sheet for safety.
- Screwdriver (Allen Key/Hex Key): Used to loosen and fasten the camera Picatinny rail mount to compatible Picatinny rails.
Note:
IR Options: The NightCrystal M6 offers two selectable IR light wavelengths:
- 850nm IR: Provides a bright beam with a faint red glow, ideal for distances up to 300 meters.
- 940nm IR: Produces an invisible beam for stealth operations, effective up to 150 meters. Please select the IR setting that best suits your specific needs.
Lens Options: The NightCrystal M6 offers four selectable objective lens:
- 16mm 1x Optical Magnifying Lens: Recommended observation distance: 5-50 meters.
- 25mm 1.5x Optical Magnifying Lens: Recommended observation distance: 15-100 meters.
- 35mm 2.5x Optical Magnifying Lens: Recommended observation distance: 50-150 meters.
- 50mm 4x Optical Magnifying Lens: Recommended observation distance: 70-200 meters.
NOTE:
- The digital 16mm/25mm/35mm/50mm refers to focal length, not the diameter of the lens.

3. Technical Specifications
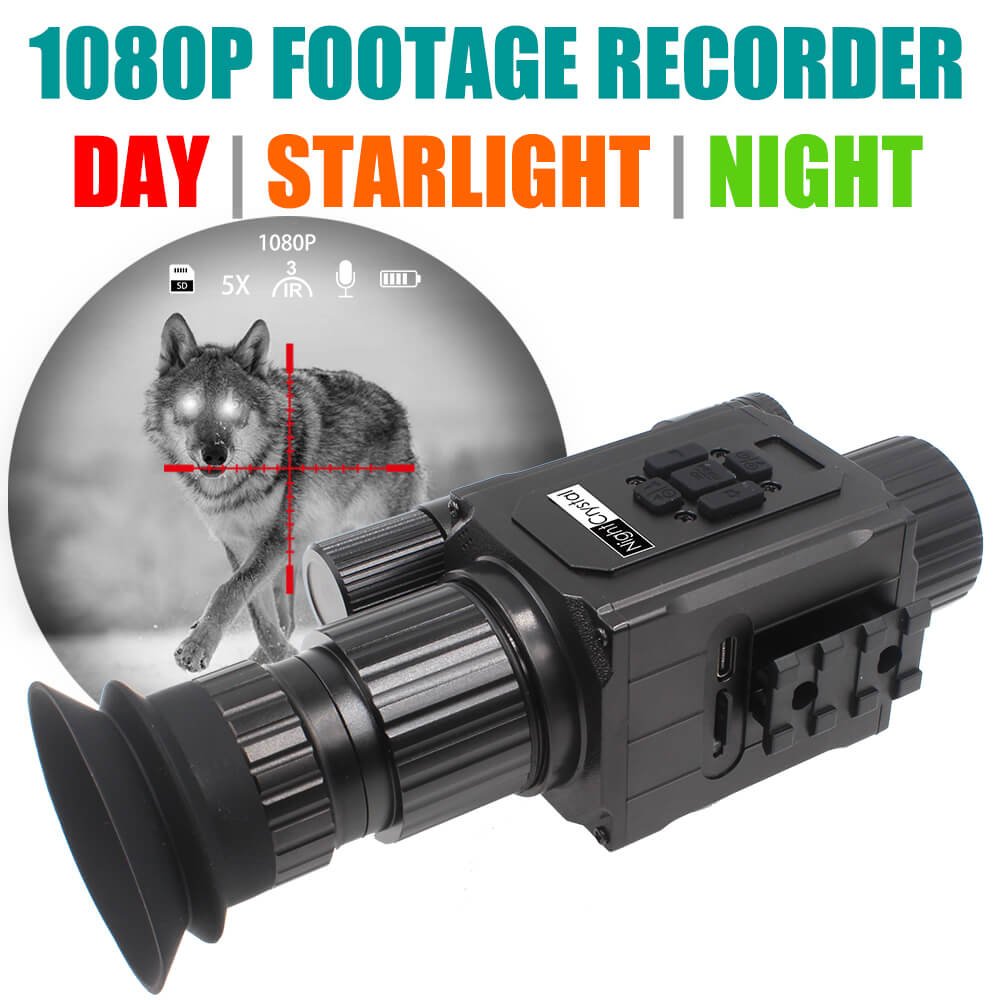
Explore the key technical features and performance capabilities of the M6 Night Vision Scope for seamless operation.
- Display: Features a 1.4-inch Circular AMOLED Screen for crisp visuals.
- Camera Sensor: 2MP sensor capable of recording in 1080P Full HD.
- Lens Options: Comes with interchangeable lenses of 16mm, 25mm, 35mm, and 50mm for various ranges.
- Infrared Light: Integrated IR illuminator with adjustable power levels.
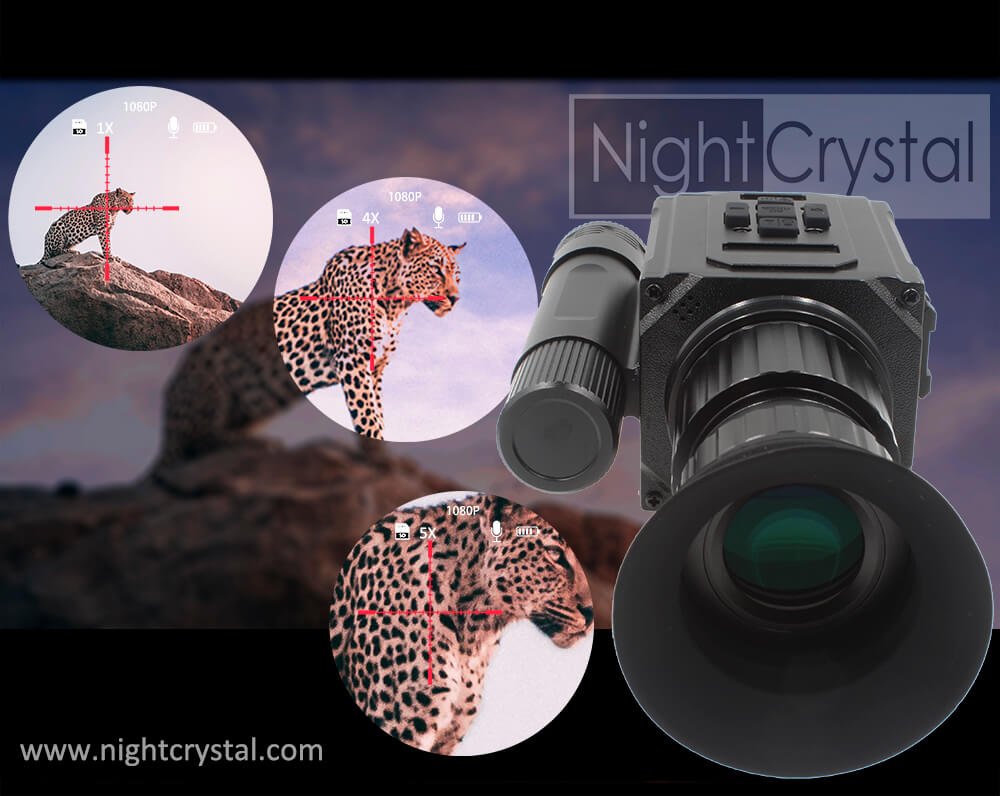
- Zoom: Digital zoom ranging from 1X to 5X, with AI assistance for centering crosshairs.
- Battery: Powered by a single 18650 battery (Not included). 2600mAh capacity provides up to 1.5 hours of runtime with IR and 5-6 hours without IR.
- Video Resolution: High-definition 1920x1080P (MOV format).
- Photo Resolution: High-definition 1920x1080P (JPG format).
- Storage: Compatible with MicroSD cards up to 128GB.
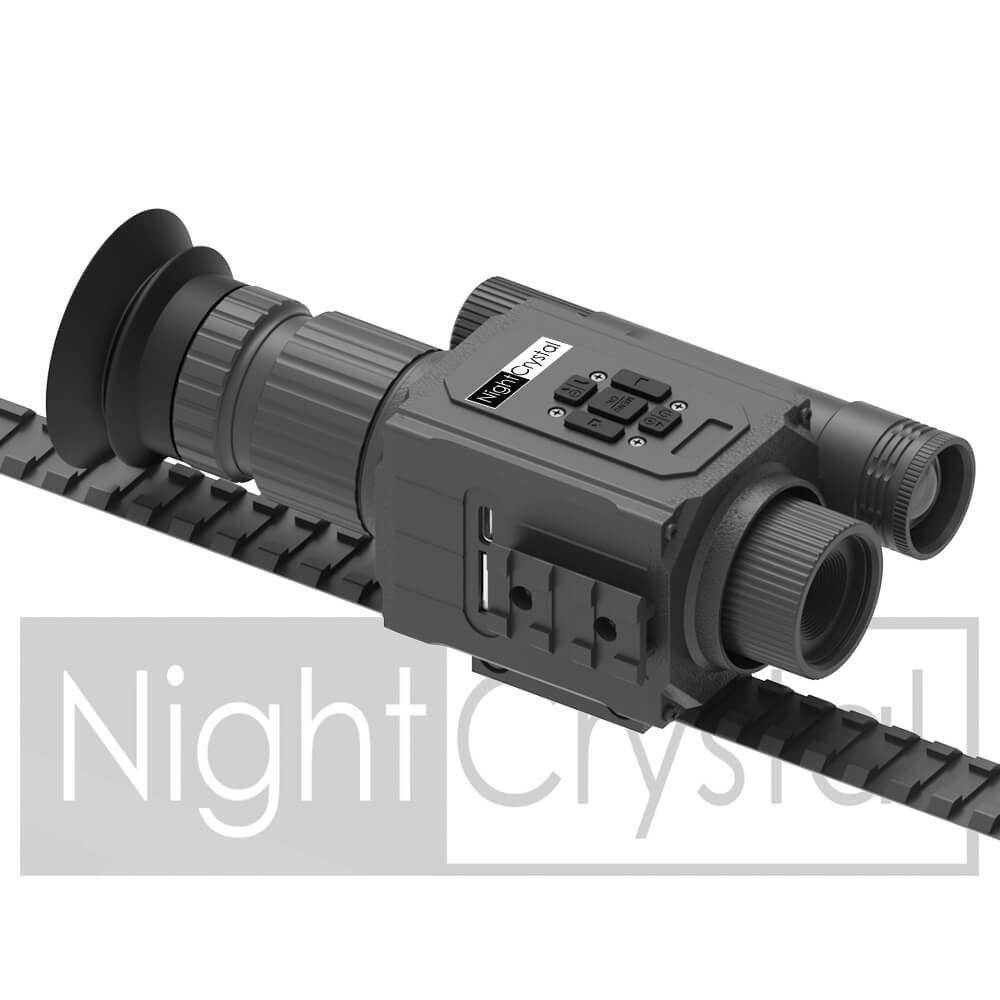
- Compatibility: Designed to fit 21mm Picatinny Rails.
- Durability: Engineered to withstand drops from up to 2 meters and features an anti-shock design.
Scope Compatibility:
- Standard Rail: Fits 21mm Picatinny rail.
- Optional Adapter: For 11mm Picatinny rails, a 11mm-to-21mm converter is required (sold separately).
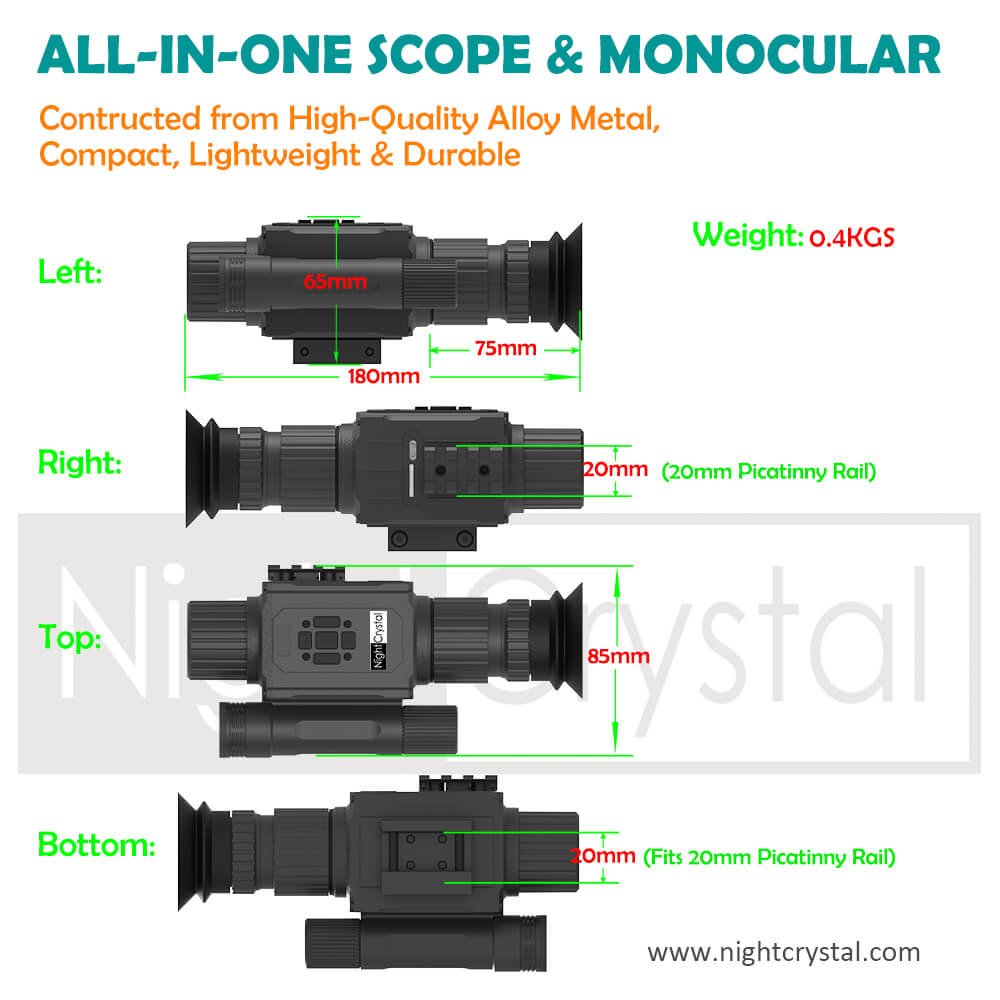
4. Device Dimensions
The compact design ensures portability without compromising functionality, making the NightCrystal M6 ideal for handheld use or Picatinny rail mounting.
- Size: 180mm (L) x 85mm (W) x 65mm (H)
- Weight: 400grams, ensuring portability without compromising durability.
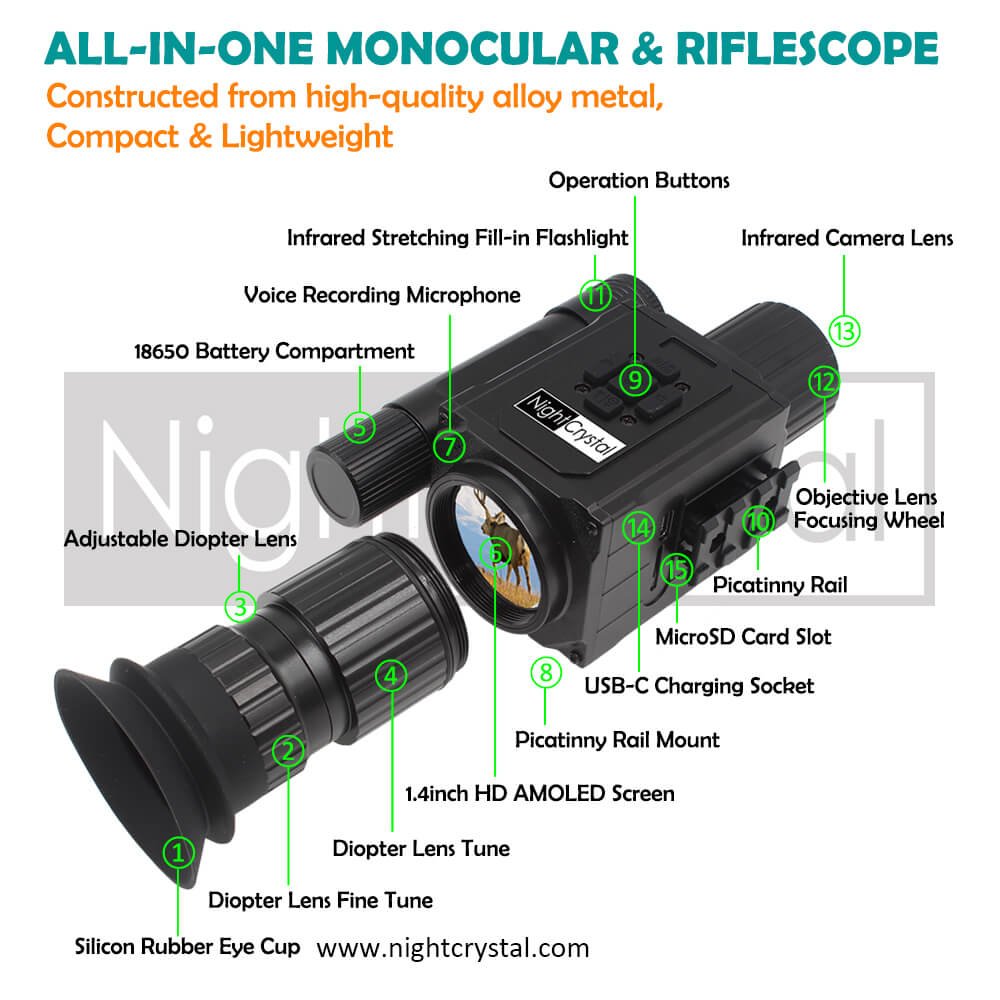
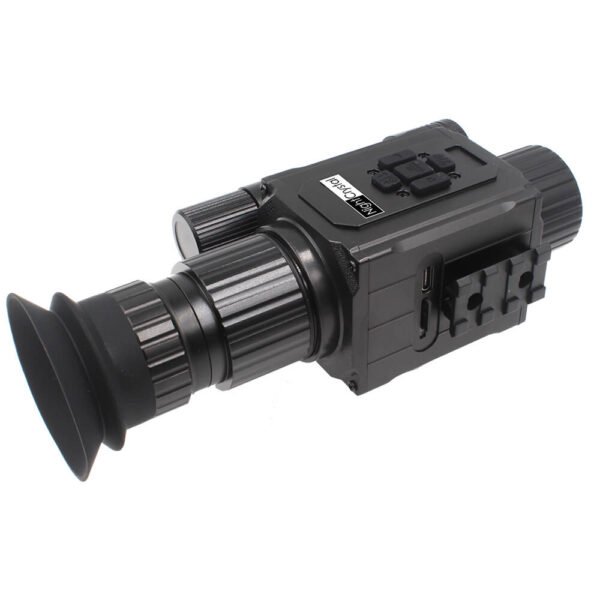
5. Component Overview
The NightCrystal M6 Night Vision Scope is equipped with various components designed for optimal performance and ease of use:
- Silicon Rubber Eye Cup (①):
- Provides comfort during extended use and blocks stray light for better visibility.
- Diopter Lens Fine Tune (②):
- Adjusts the focus of the eyepiece for users with varying vision requirements.
- Adjustable Diopter Lens (③):
- Allows precise calibration to sharpen the image and crosshair display.
- Diopter Lens Tune (④):
- Ensures clarity by further refining the focus.
- Battery Compartment (⑤):
- Houses the 18650 rechargeable battery for powering the device.
- 1.4-inch HD OLED Screen (⑥):
- Displays live view, menu settings, and video playback.
- Voice Recording Microphone (⑦):
- Captures ambient audio during video recording.
- Picatinny Rail Mount (⑧):
- Allows secure attachment to rifles or other compatible platforms.
- Operation Buttons (⑨):
- Includes power, IR control, menu, photo, and video recording buttons for seamless operation.
- Picatinny Rail Plug-in (⑩):
- Ensures firm connectivity with the rail system.
- Infrared Stretching Fill-in Flashlight (⑪):
- Provides adjustable illumination for low-light conditions.
- Objective Lens Focusing Wheel (⑫):
- Fine-tunes the focus of the objective lens for sharp imaging.
- Infrared Camera Lens (⑬):
- Captures detailed night vision footage and photos.
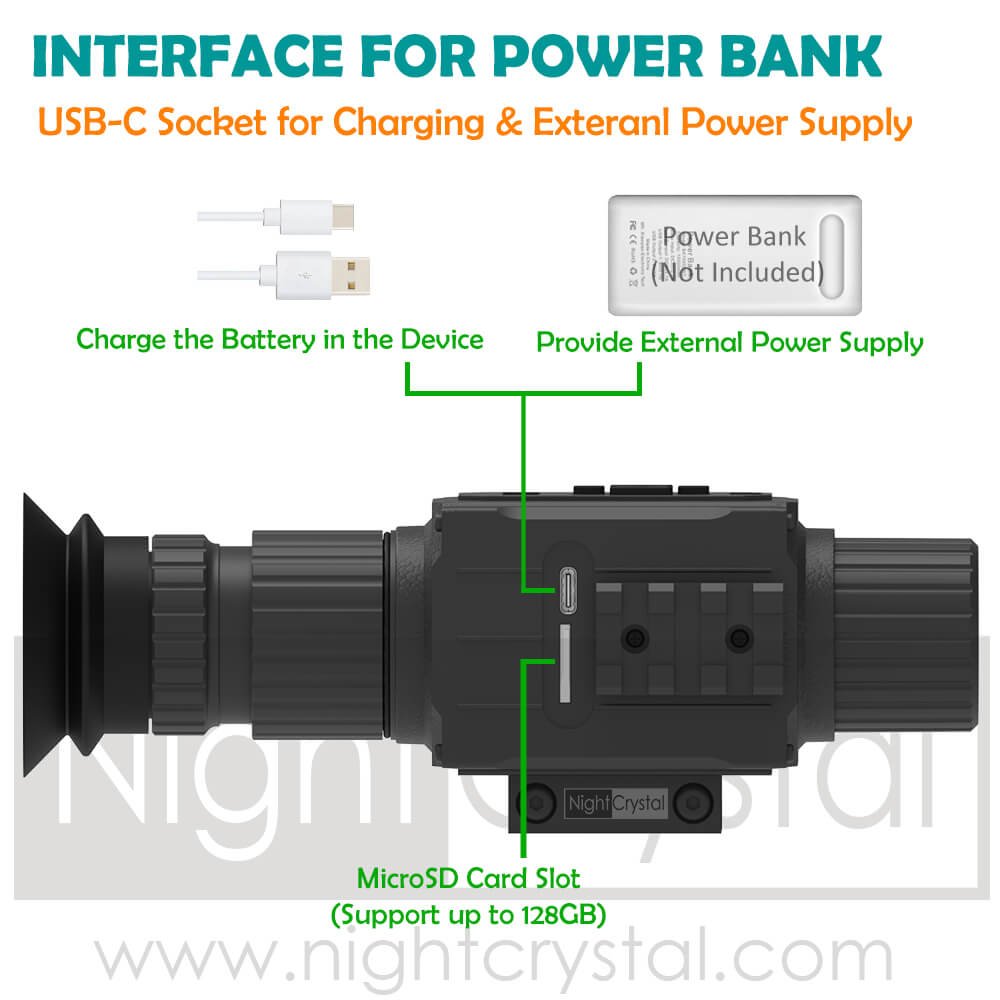
- USB-C Charging Socket (⑭):
- Enables fast and convenient charging of the battery.
- MicroSD Card Slot (⑮):
- Supports external storage for photos and videos.
Each component has been meticulously designed to ensure durability, ease of use, and versatility.
The NightCrystal M6 features a built-in adjustable crosshair and a 20mm rail mount for easy attachment to Picatinny rails. It can also be used as a handheld monocular for added versatility.
Installation Steps:
- Prepare the Device:
- Ensure the battery is fully charged and the insulation sheet is removed.
- Verify the MicroSD card is correctly inserted.
- Mounting on Picatinny Rail:
- Align the Picatinny rail mount with the 20mm rail on your rifle.
- Secure the device using the included screws and ensure a snug fit.
- Adjust the alignment of the device to ensure the crosshair is centered.
- Handheld Use:
- Attach the silicon rubber eye cup for comfort.
- Use the diopter adjustment for sharp imaging.
- Calibration:
- Follow the calibration instructions in Section 10 to optimize focus and alignment.

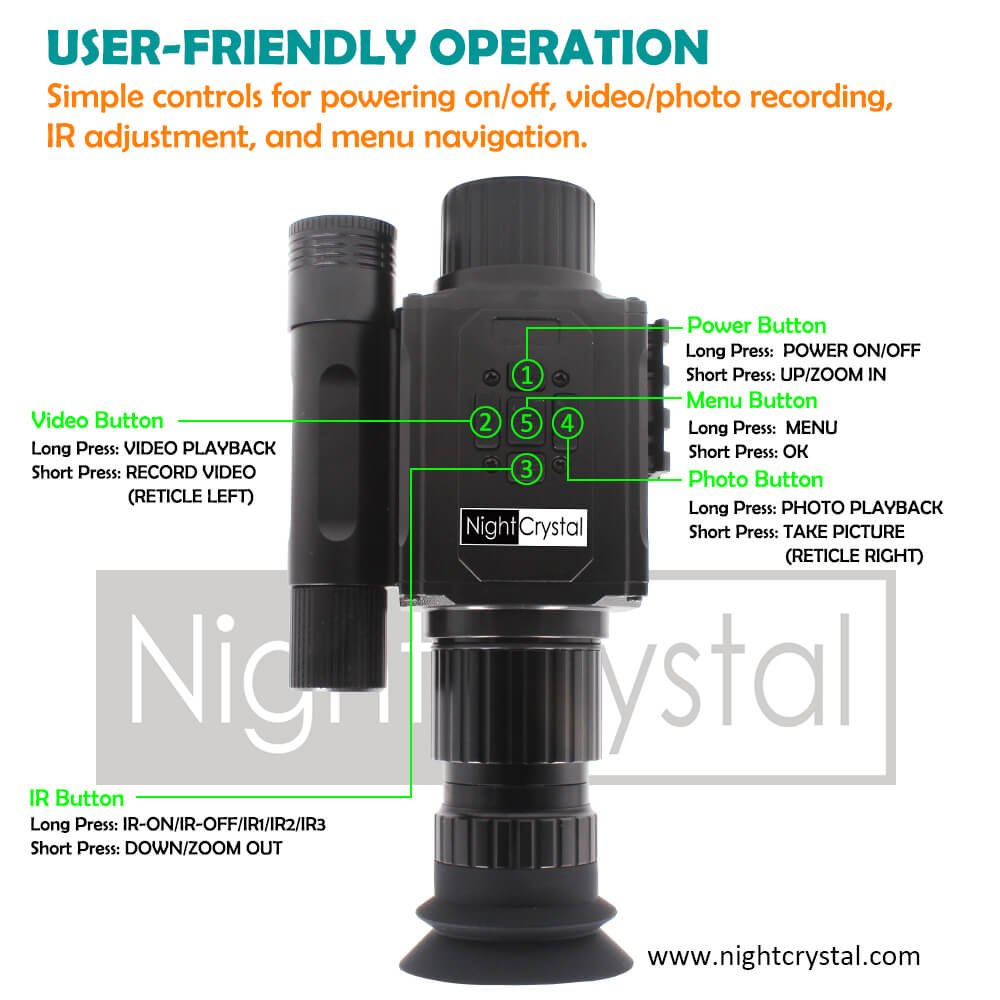
7. Control Buttons and Functions
The night vision device is equipped with several buttons for easy control and operation. Each button has both short press and long press functions, allowing you to access various features such as power on/off, menu navigation, photo/video capture, and IR flashlight control.
| Button | Long Press Action | Short Press Action |
| 1. POWER/UP | Turn the device ON/OFF. | Zoom in or move up in the menu |
| 2. VIDEO/LEFT | Playback recorded videos. | Start/stop video recording or move left. |
| 3. IR/DOWN | Turn IR ON/OFF, Switch between IR1/IR2/IR3 | Zoom out or move down in the menu |
| 4. CAMERA/RIGHT | View captured photos. | Take a photo or move right. |
| 5. MENU/OK | Open or close the settings menu. | Select an option in the menu. |
8. Menu Navigation and Customization
The NightCrystal M6 night vision scope offers a variety of customizable settings:
- Contrast Ratio: Adjust the contrast for day/night vision (4 levels). Lower levels increase brightness for better night performance.
- Language: Choose from 11 languages, including English, Español, Português, Polski, Français, Русский, Italiano, Deutsch, 中文, 日本語, and العربية.
- Crosshair: Toggle crosshairs ON/OFF.
- Crosshair Adjustment: Adjust crosshair position using directional buttons.
- Video Prompt (Video Looping): Enable/disable continuous video recording.
- Mic (Microphone): Activate or mute sound recording.
- Date Display: Choose to display or hide the date on recorded videos.
- Time Setting: Set the date and time on recorded videos.
- Screen Protection: Activate a screen saver (Off, 3, 5, or 10 minutes).
- Screen Brightness: Set the brightness level (1–6 gears). Higher levels are darker.
- Auto Power-Off: Set automatic shutdown to save battery (Off, 3, 5, or 10 minutes).
- Format: To format the MicroSD card.
- Reset Systems: To reset the system, return to factory settings.
- Version: The version of the firmware.

9. On-Screen Icon Guide
The following icons provide essential information about the device’s status and settings:
- Battery Capacity: Displays the remaining battery level. A red icon indicates low battery.
- Voice Record: Appears when the microphone is recording sound.
- Recording Time: Shows the duration of the current video recording.
- IR ON/IR1/IR2/IR3: Indicates the IR flashlight status and power level (IR1 is low, IR3 is high).
- MicroSD Card: Displays when a MicroSD card is inserted. A warning icon indicates issues with the card.
- Digital Zoom: Appears when digital zoom is active, indicating the magnification level.
- Embed Crosshair: Shows if the crosshair is enabled. It can be moved or hidden via settings.
- Date Stamp: Displays the current date and time on the screen.
- 1080p HD Resolution: Indicates when the device is recording or displaying in 1080p HD.
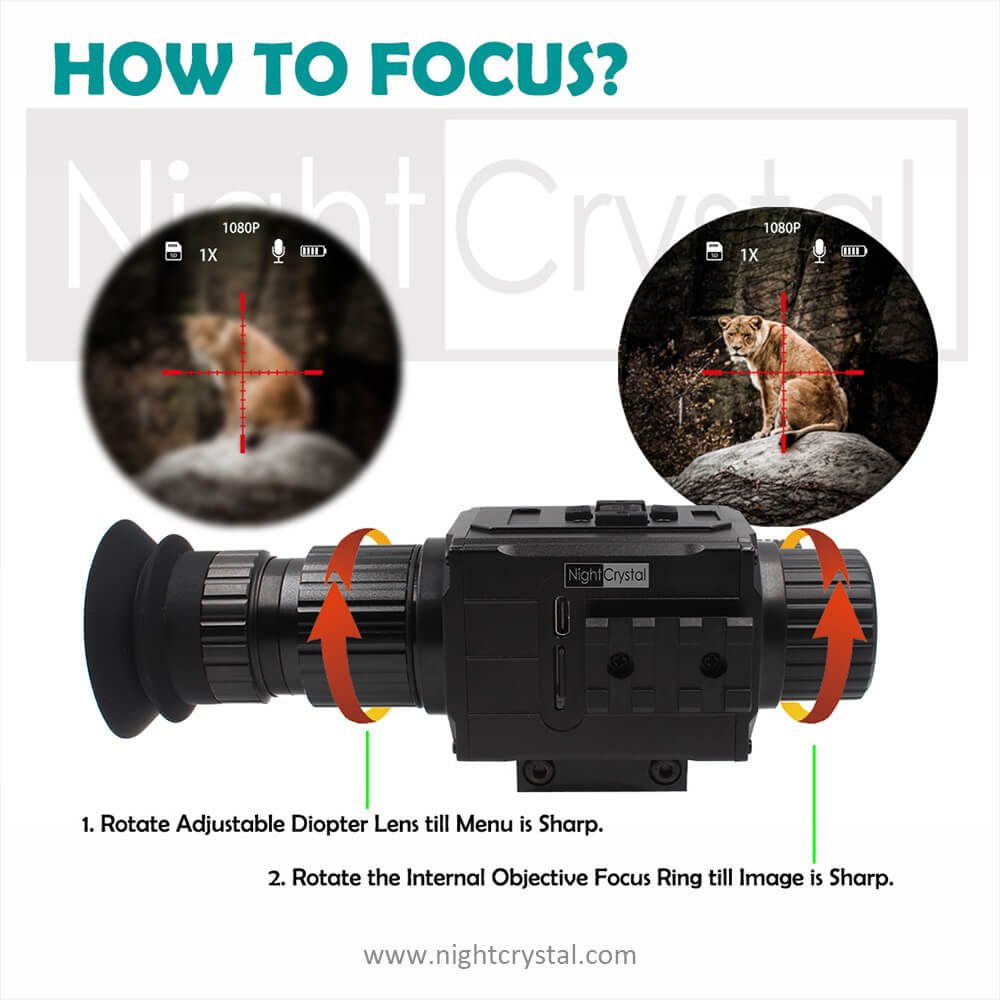
Follow these steps carefully to ensure optimal alignment and performance of your NightCrystal M6 night vision scope camera:
- Rotate the Diopter Lens to achieve a clear view of the menu and interface.
- Use the Objective Lens Focusing Wheel to sharpen the view of distant objects. Adjust until the target appears crisp and well-defined.
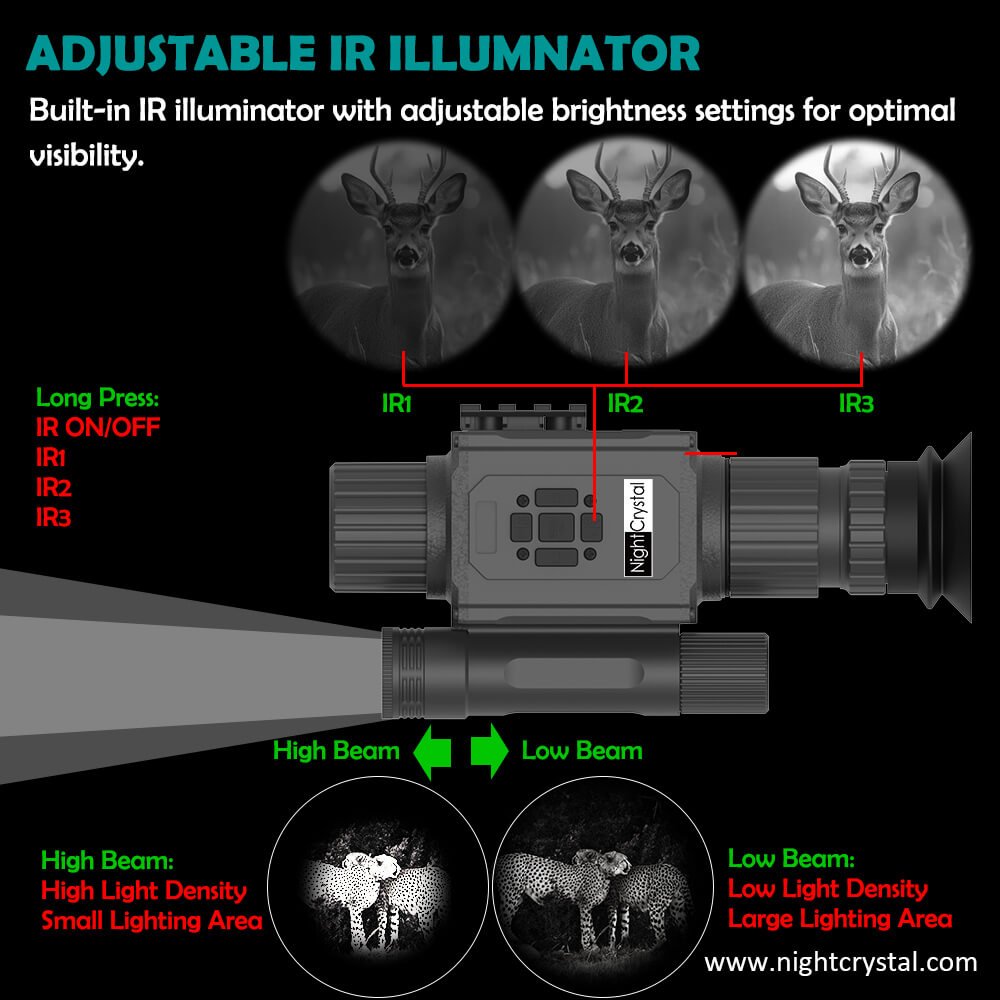
10. IR Flashlight Usage
The IR flashlight enhances visibility in low-light or nighttime conditions. You can adjust both the IR power level (IR1, IR2, IR3) and the beam intensity for optimal performance. Here’s how to use and adjust these settings:
- IR Activation: Press and hold the IR button to toggle through power levels (IR1/IR2/IR3).
- Beam Adjustment: Stretch or compress the flashlight head to widen or narrow the beam focus.
- Pro Tips: Use lower IR levels for short-range observation and higher levels for long-range visibility.
12. Charging and Power Options
Versatile Charging with USB-C
- The NightCrystal M6 Night Vision Scope features a convenient built-in USB-C interface, allowing for direct charging of its internal battery. Simply connect the included USB-C cable to a power adapter or compatible USB port to recharge the device.
Using External Power Banks
- For extended use, connect an external power bank to the device via the USB-C port. This ensures continuous operation during prolonged hunting or scouting sessions, providing flexibility and peace of mind when operating in the field or at base camp. The external power bank can be a valuable backup for scenarios requiring longer runtime.
Charging Tips
- Use only high-quality USB-C cables and power banks to prevent potential damage to the device.
- Check the battery level icon on the screen to monitor charging progress.
13. AI Zoom
The AI Zoom feature automatically adjusts the zoom level as you zoom in or out. To activate, simply use the zoom buttons on the control panel. The system ensures smooth zoom transitions, but please note that the crosshairs will not stay centered on the screen.
14. Troubleshooting Guide (M6 User Operation Manual)
This section provides solutions for common issues encountered with the NightCrystal M6 Night Vision Scope camera.
1. Device Does Not Power On
Potential Causes:
- The 18650 battery is drained or improperly installed.
- Battery insulation sheet has not been removed.
- Device contacts are dirty or corroded.
Solutions:
- Verify the battery orientation (positive pole facing inward).
- Remove the insulation sheet if using the battery for the first time.
- Charge the battery fully before use.
- Clean battery contacts with a soft, dry cloth.
2. Blurry Images on the Display
Potential Causes:
- The diopter lens is out of focus.
- The objective lens is out of focus.
- Dust or debris on the lens or display.
Solutions:
- Rotate the Diopter Adjustment Ring to sharpen the display text and icons.
- Use the Objective Lens Focusing Wheel to sharpen the view of distant objects. Adjust until the target appears crisp and well-defined.
- Use a clean, microfiber cloth to gently wipe the lens. Avoid using abrasive materials.
3. IR Flashlight Not Working
Potential Causes:
- IR flashlight is turned off.
- Low battery power.
- Flashlight beam adjustment is misaligned.
Solutions:
- Hold the IR/Down Button for 1 second to activate the IR flashlight.
- Replace or recharge the 18650 battery.
- Adjust the flashlight hood: push inward for short-range or pull outward for long-range focus.
4. Device Freezes or Becomes Unresponsive
Potential Causes:
- Software glitch or overheating.
- MicroSD card compatibility issue.
- Frequent button presses causing overload of the device’s processing capacity.
Solutions:
- Remove and reinsert the MicroSD card (TF card). Ensure the card is Class 10 or UHS-I (up to 128GB).
- Reduce the frequency of pressing the photo-taking button for smoother operation.
- Press and hold the Power/Up Button for 10 seconds to force a shutdown. Restart the device.
- Remove the Battery and Reinsert the Battery: If the device fails to shut down, remove the battery to shut down and insert the battery to turn on again, and the device will refresh itself.
- Firmware Update: If the freezing issue persists, contact us for the latest firmware update to address the issue. Updated firmware helps avoid excessive button pressing and ensures optimal device performance.
5. Recorded Videos or Photos Not Saving
Potential Causes:
- MicroSD card (TF card) not properly inserted or formatted.
- Insufficient storage space on the TF card.
- Corrupted MicroSD card (TF card).
Solutions:
- Remove the MicroSD card (TF card) and reinsert it firmly into the slot.
- Format the MicroSD card (TF card) using the device menu under Settings > Format Storage.
- Replace the MicroSD card (TF card) if corrupted or damaged.
6. Screen Flickering or Distorted Image
Potential Causes:
- Low battery voltage.
- RF interference from other devices.
Solutions:
- Replace or recharge the 18650 battery to ensure sufficient power.
- Move the device away from sources of strong electromagnetic interference (e.g., radios or large electronics).
7. Night Vision Mode Not Activating
Potential Causes:
- IR flashlight is off.
- Low ambient light conditions improperly detected.
Solutions:
- Hold the IR/Down Button for 1 second to manually activate the IR flashlight.
- Ensure the IR flashlight is correctly aligned with the viewing field.
8. Short Battery Life
Potential Causes:
- Excessive IR Flashlight Usage:
- The built-in IR flashlight, especially when set to IR3 (highest power level), consumes a significant amount of power. Prolonged use at the highest IR power setting can quickly drain the battery.
- Frequent Video Recording:
- Recording videos, particularly in high resolution (1080p), requires substantial battery power and can shorten runtime.
- Old or Low-Quality Battery:
- Batteries lose capacity over time or may not meet the required performance standards.
- Battery Not Fully Charged:
- A partially charged battery will naturally have a shorter runtime.
- High Screen Brightness or Frequent Menu Use:
- Operating the device with maximum screen brightness or spending extended time navigating menus can also drain the battery.
- Battery Protection Mechanisms:
- The device may shut down prematurely to protect the internal components if the battery power is insufficient to operate effectively.
Solutions:
- Optimize IR Flashlight Usage:
- Reduce the IR Level by adjusting it from IR3 (highest power setting) to IR2 or IR1 through the menu to conserve power.
- For longer durations, consider using an external IR flashlight to supplement or replace the built-in IR flashlight.
- Limit Video Recording:
- Record videos only when necessary and avoid prolonged recording sessions to save battery power.
- Use a High-Quality Battery:
- Replace older or low-quality batteries with a high-capacity 18650 lithium battery from a reliable manufacturer.
- Ensure a Full Charge:
- Always fully charge the battery before use, and ensure the charger is functioning correctly.
- Adjust Screen Settings:
- Reduce the screen brightness in the menu settings and activate the screen saver feature to minimize power usage during idle times.
- Carry Spare Batteries:
- Keep fully charged spare 18650 batteries on hand for extended usage.
- Inspect Battery Contacts:
- Check for debris or corrosion on the battery contacts and clean them if necessary to ensure efficient power transfer.
9. Unable to Play Recorded Videos
Potential Causes:
- Unsupported video player on the computer or device.
- MicroSD card removed prematurely.
Solutions:
- Use a media player that supports MOV file format (e.g., VLC Player).
- Always eject the TF card safely before removing it from the device.
10. “No MicroSD Card” Error Displayed
Potential Causes:
- MicroSD card not properly inserted or detected.
- Incompatible MicroSD card type.
Solutions:
- Remove and reinsert the MicroSD card to ensure it clicks into place.
- Use a compatible card (Class 10 or UHS-I).
11. Screen Turns Off After One Minute
If the screen turns off after one minute of inactivity, it’s likely due to the Screen Protection setting being enabled. To prevent the screen from automatically shutting down:
- Go to the Menu.
- Select Screen Protection and set it to Off.
This will ensure the screen stays on continuously until manually turned off.
12. Unable to See Any Light When the IR Flashlight is On
The infrared (IR) flashlight emits light that is invisible to the human eye. However, you can test the IR flashlight by following these steps:
- Place your hand or the device close to a wall while the IR flashlight is turned on.
- You should notice a faint red glow, indicating the IR light is functioning.
- At night, when the IR flashlight and night mode are activated, you’ll see the view through the scope become significantly brighter due to the enhanced illumination provided by the IR light.
13. The View is Too Dark at Night
If the view appears too dark, it’s likely that the IR flashlight is off or the settings need adjusting:
- Long press the IR/DOWN button to turn on the IR flashlight and activate night mode.
- Adjust the IR flashlight intensity by stretching or retracting the flashlight head to achieve the desired beam strength.
- Fine-tune the flashlight direction to ensure it is illuminating the area properly.
- Use the Contrast Ratio setting in the Menu to adjust the contrast between the dark and light areas for optimal visibility in night mode.
- You can also adjust the Screen Brightness in the menu to make the display more visible in low-light conditions.
14. The View is Too Bright During the Daytime
During the daytime, the IR flashlight and night mode should not be used, as they may cause the view to appear overly bright:
- Ensure the IR flashlight is turned off and night mode is deactivated.
- Use the Contrast Ratio in the Menu to adjust the image for optimal daytime visibility.
- Adjust the Screen Brightness in the Menu to reduce the intensity of the display during bright daylight.
15. The Scope Camera Turns Off Automatically After a Period (e.g., 5 Minutes)
If the device powers off automatically after a short period, the Auto Power Off setting may be activated:
- Go to the Menu.
- Select Auto Power Off and set it to Off to disable automatic shutdown.
This will prevent the device from turning off unexpectedly and allow continuous operation.
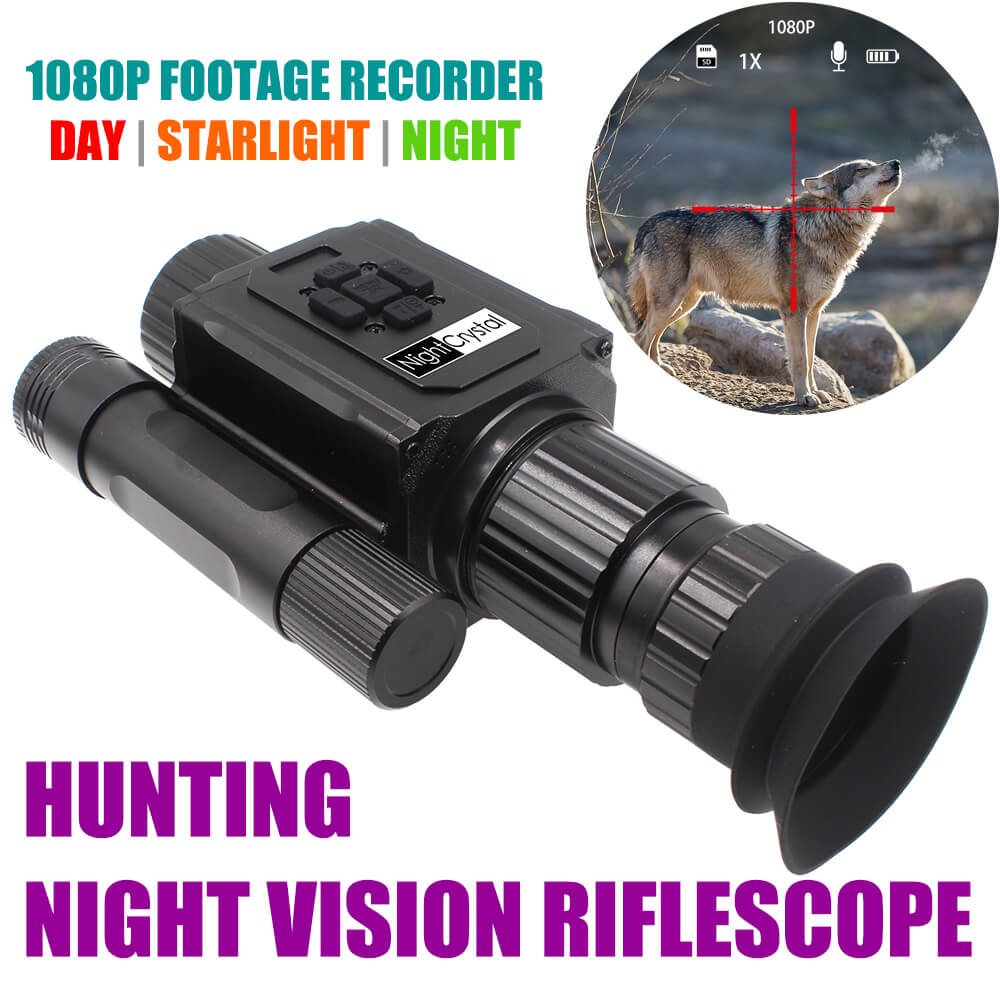
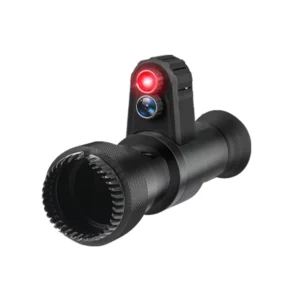
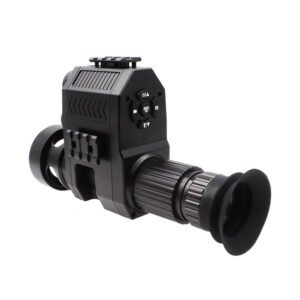
M6 Night Vision Scope with 1.4inch HD Screen
The Easiest Hunting 850nm 940nm Infrared Night Vision Scope Affordable; Full Color View in Daytime & Twilight, Black & White in Nighttime; 1080p Hunting Adventure Footage; Adjustable Crosshairs & 1x-5x Digital Zoom; Versatile Charging Options with Built-in USB-C Interface;
Featured products
-
B-Plus Night Vision Scope Add-on
Original price was: $199.98.$99.99Current price is: $99.99. -
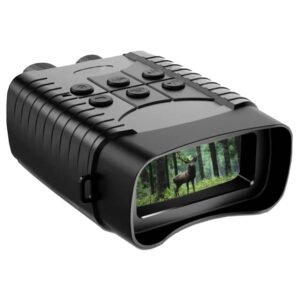
B2 1080p IR Night Vision Binoculars
Price range: $139.99 through $149.99 -
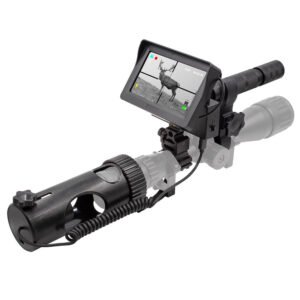
M2 DIY Hunting Night Vision Scope Attachment Camera
Price range: $99.99 through $119.99 -
M3B 720p Night Vision Scope Add on Hunting Camera
Price range: $79.99 through $94.99 -
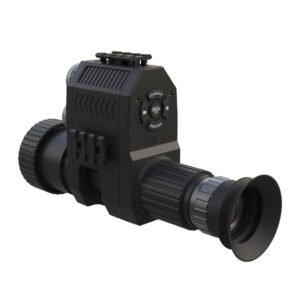
M4C Hunting Night Vision Scope Attachment
Price range: $89.99 through $99.99